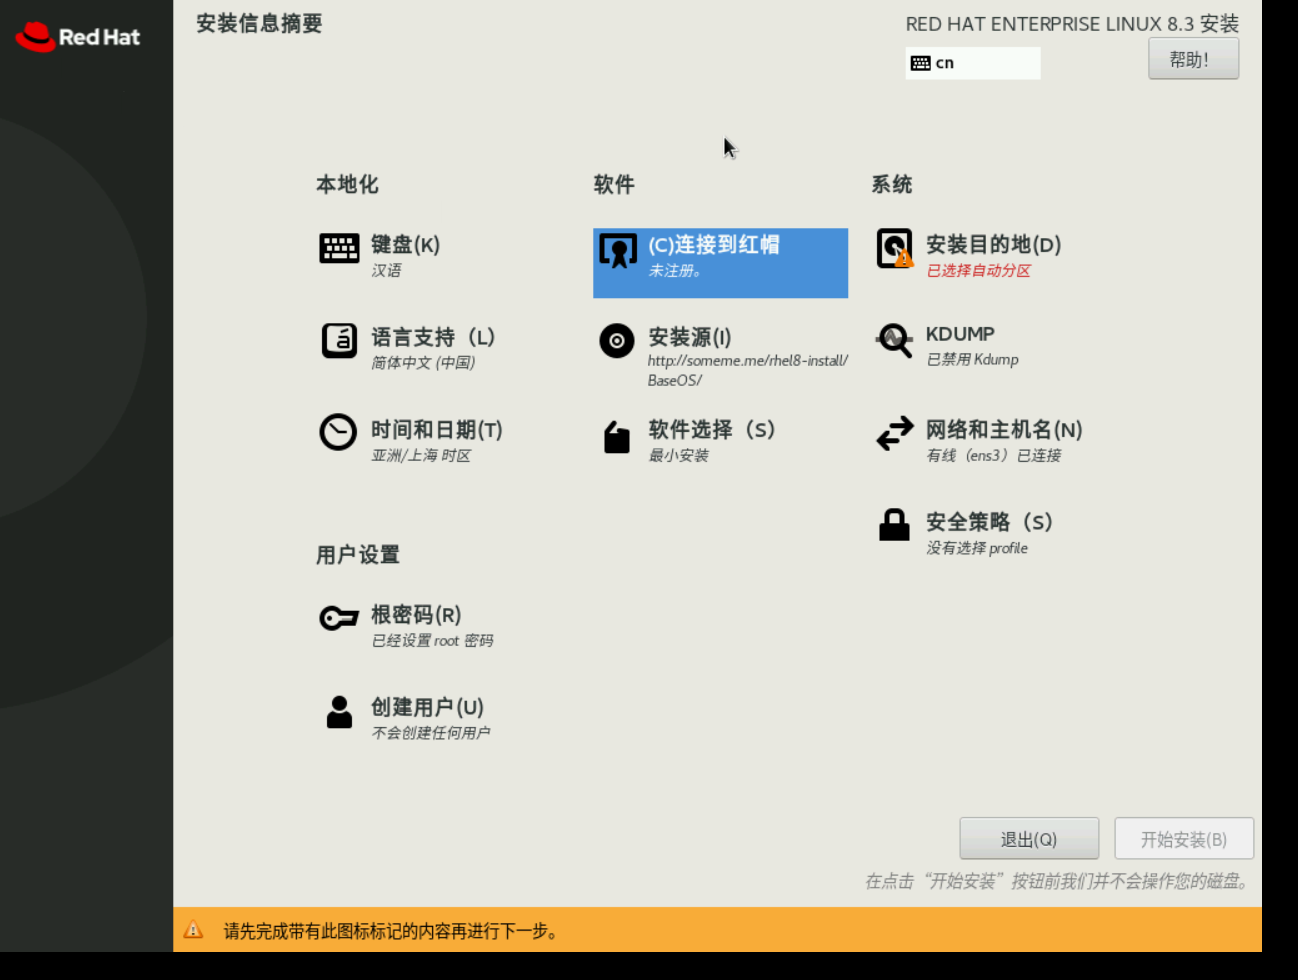
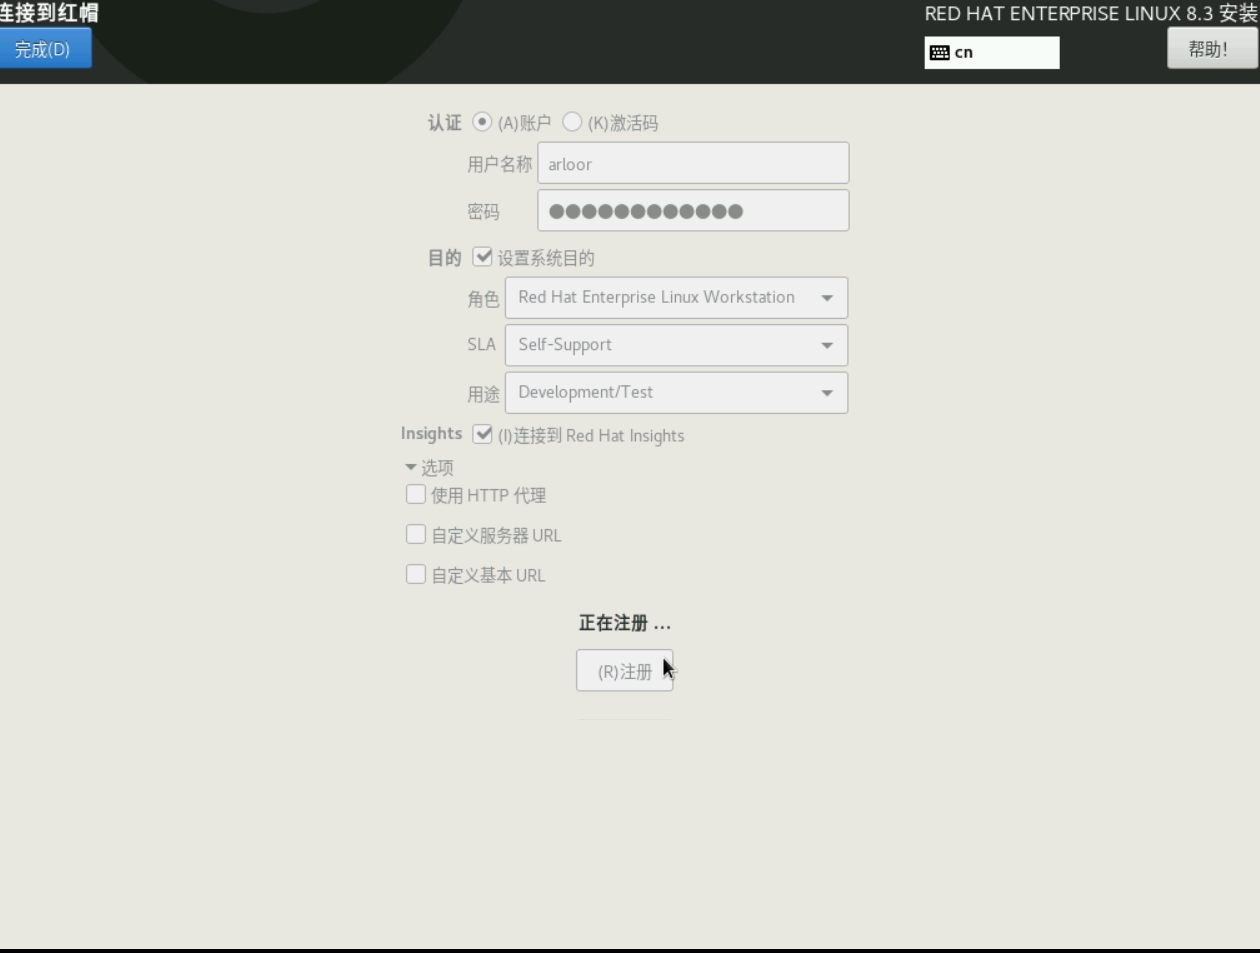
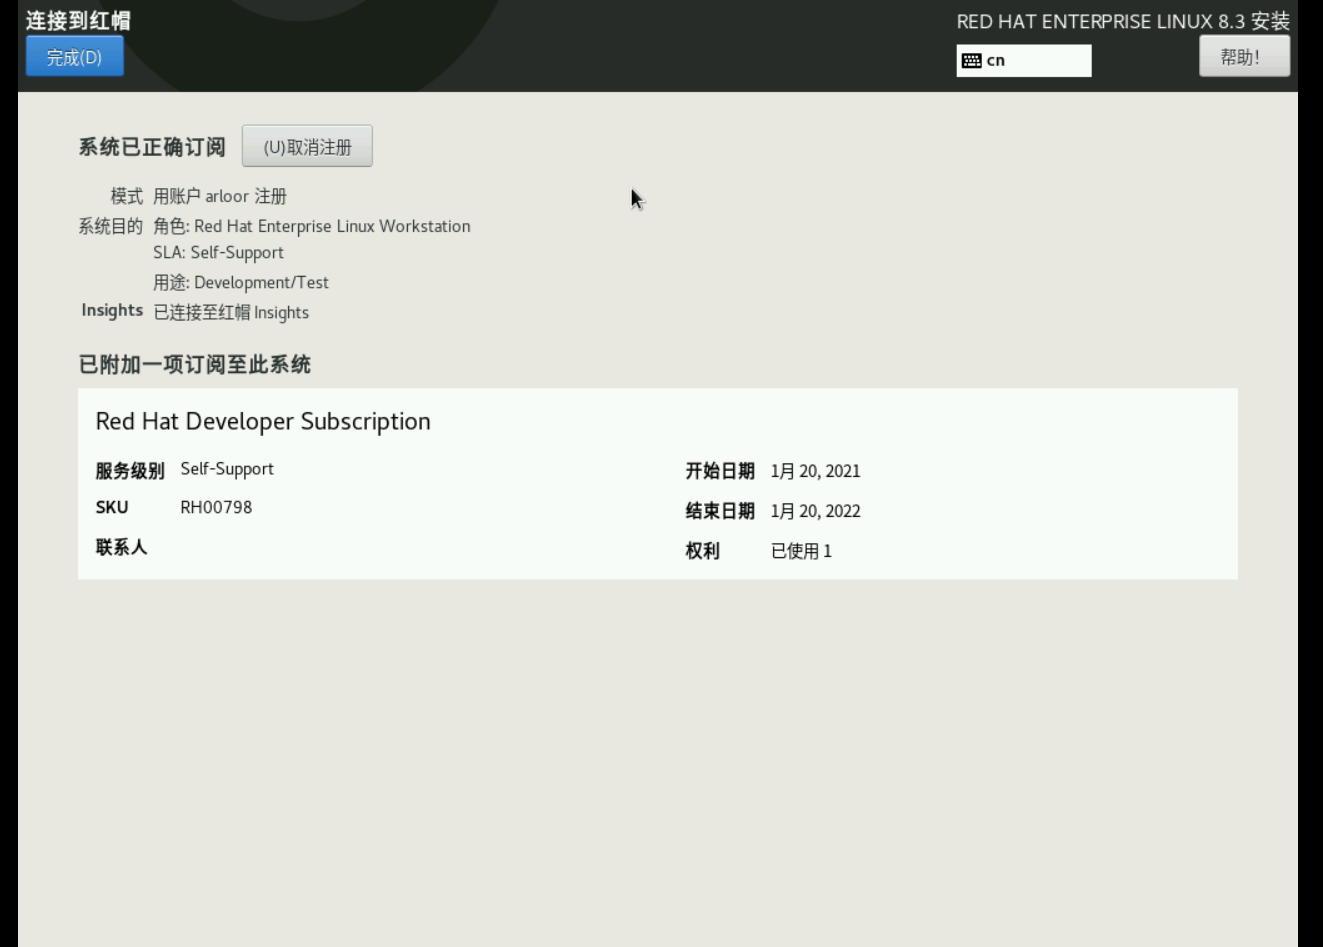
2020年12月8日,红帽宣布将从2021年12月31日起停止维护centos系统,转而将精力投向centos stream。2021年1月20日,红帽又宣布rhel系统的开发者订阅可以用于小型生产环境,允许授权16台主机获得红帽的更新。原文链接新年,新的Red Hat Enterprise Linux程序:访问RHEL的更简便方法。
但是想要在云服务器上安装rhel系统在当前并不是一件简单的事情,这篇博客就是介绍一种自动安装rhel8的方式:pxeboot+kickstart。
一次标准的pxeboot流程
- 机器从网络启动,触发 pxe 相关的固件模块发送 DHCP 请求,请求以广播方式向整个网段传播
- DHCP server 接收到请求,并响应请求,回应 ip 信息和 next_ip(tftp ip 的地址)
- 机器配置接收到的 ip 和其他网络信息,发送 ARP 广播,获取 tftp server 的 mac 地址
- 拿到 tftp server 的 ip 和 mac,机器就向 tftp server 请求启动脚本 pxelinux.0
- tftp server 应答启动脚本 pxelinux.0
- 执行 pxelinux.0 文件,机器把 pxe 对应的功能在内存里开始运行
- pxe 模块根据约定,向 TFTP server 发起请求,获取启动脚本 pxelinux.cfg
- 根据启动脚本的内容,请求并加载内核文件 vmlinuz、initrd.img
- 启动安装系统流程,到指定的地址下载 kickstart(ftp/http)。
- 根据 kickstart 文件从对应的地址(nfs/http/ftp)下载安装包安装系统,并自动配置所有的选项
- 系统安装完成
引用自cizixs.com
我们的流程是从8开始,省略之前的步骤,也更适合用于阿里云,腾讯云。
过程简述
- 搭建redhat8的安装源,类似阿里云腾讯云的centos镜像网站
- 下载redhat8的isolinux的内核和init程序的img文件
- 编写grub2启动的menuentry,填写相关内核参数,以使用上述的内核文件和init程序启动redhat8安装程序。
- 安装redhat系统
- 【进阶】使用kickstart文件控制安装过程自动进行
全部的参考文档都在执行高级 RHEL 安装
1. 创建镜像网站
首先到红帽开发者网站-rhel下载注册开发者账号,然后下载rhel8的DVD iso到一台提供http服务的公网vps上。
然后挂载该镜像到一个目录,然后启动httpd服务(文档:使用 HTTP 或 HTTPS 创建安装源)
# 下面这个链接自己在下载页面复制
wget https://access.cdn.redhat.com/content/origin/files/sha256/30/30fd8dff2d29a384bd97886fa826fa5be872213c81e853eae3f9d9674f720ad0/rhel-8.3-x86_64-dvd.iso?_auth_=xxxxxxxxxxx -O redhat8.iso
lsof -i:80
yum install -y httpd
mkdir /var/www/html/rhel8-install/
mount -o loop,ro -t iso9660 ~/redhat8.iso /var/www/html/rhel8-install/
systemctl start httpd.service
# umount /var/www/html/rhel8-install/
现在可以访问http://199.180.115.74/rhel8-install/来查看镜像网站 http://someme.me/rhel8-install/
2. 下载内核文件和initd程序文件
安装redhat系统也需要一个系统,而系统的启动本身就需要一个linux内核和initd程序(pid=1的程序),这一步所做的就是下载这两个文件到boot分区上的文件夹中。
我们使用第一步搭建好的镜像网站来下载内核和initd文件:
baseUrl="http://someme.me/rhel8-install/"
## 下载kernel和initrd
echo "initrd.img downloading...."
wget --no-check-certificate -qO '/boot/initrd.img' "${baseUrl}/isolinux/initrd.img"
echo "vmlinuz downloading...."
wget --no-check-certificate -qO '/boot/vmlinuz' "${baseUrl}/isolinux/vmlinuz"
echo "done"
下载好的内核和initd文件都在/boot路径下。在linux系统上,无论哪种分区,/boot都在启动分区上。
3. 编写grub2启动项的内核参数
先给下一个实际的menuentry例子:
menuentry 'Install Centos8 [ ]' --class debian --class gnu-linux --class gnu --class os {
        load_video
        set gfxpayload=keep
        insmod gzio
        insmod part_msdos
        insmod ext2
        set root='hd0,msdos1'
        if [ x$feature_platform_search_hint = xy ]; then
          search --no-floppy --fs-uuid --set=root --hint='hd0,msdos1'  4b499d76-769a-40a0-93dc-4a31a59add28
        else
          search --no-floppy --fs-uuid --set=root 4b499d76-769a-40a0-93dc-4a31a59add28
        fi
        linux16 /boot/vmlinuz  ip=dhcp inst.repo=http://someme.me/rhel8-install/BaseOS/ inst.lang=zh_CN inst.keymap=cn selinux=0 inst.stage2=http://someme.me/rhel8-install/
        initrd16        /boot/initrd.img
}
值得关注的是linux16和initrd16开头的行,其他的行都是从系统启动项的其他menuentry里抄过来的,以保证grub2能正常地引导linux内核。
linux16
这是内核启动参数,这些参数就是控制如何启动安装系统的系统。一般安装系统的时候我们使用的是linux发行版提供的DVD iso或者boot iso。DVD iso是一个大而全的东西,boot iso也提供了足够用于安装系统的东西。我们这种方式比较特别,启动安装过程的东西只有内核和initd程序,这是不够的。这些内核启动参数就是告诉内核,哪里能找到安装所需的软件。
关于这些参数的更多解释:Anaconda Boot Options或者查看高级安装-引导选项
这里简单讲下我们用到的参数:
- ip=dhcp 指定本机连接网络的方式,这台机器是dhcp的。对于非dhcp的机器,需要
ip=<ip>::<gateway>:<netmask>:<hostname>:<interface>:none
例如:
ip=$IPv4::$GATE:$MASK:my_hostname:eth0:none
其中IPv4,GATE,MASK这些需要从当前系统获取。
- inst.repo= 安装源,这里就是上面的镜像网站。
- inst.stage2= 安装器运行的镜像,也被称为liveOS。不指定的话,会与inst.repo相同。这个选项需要包含有效 .treeinfo 文件的目录路径;如果发现这个文件,则会从这个文件中读取运行时映象位置。如果 .treeinfo 文件不可用,Anaconda 会尝试从 LiveOS/squashfs.img 中载入该映象。http://someme.me/rhel8-install/.treeinfo下的stage2标签
- selinux=0 关闭selinux
initrd16
指定initd文件的位置
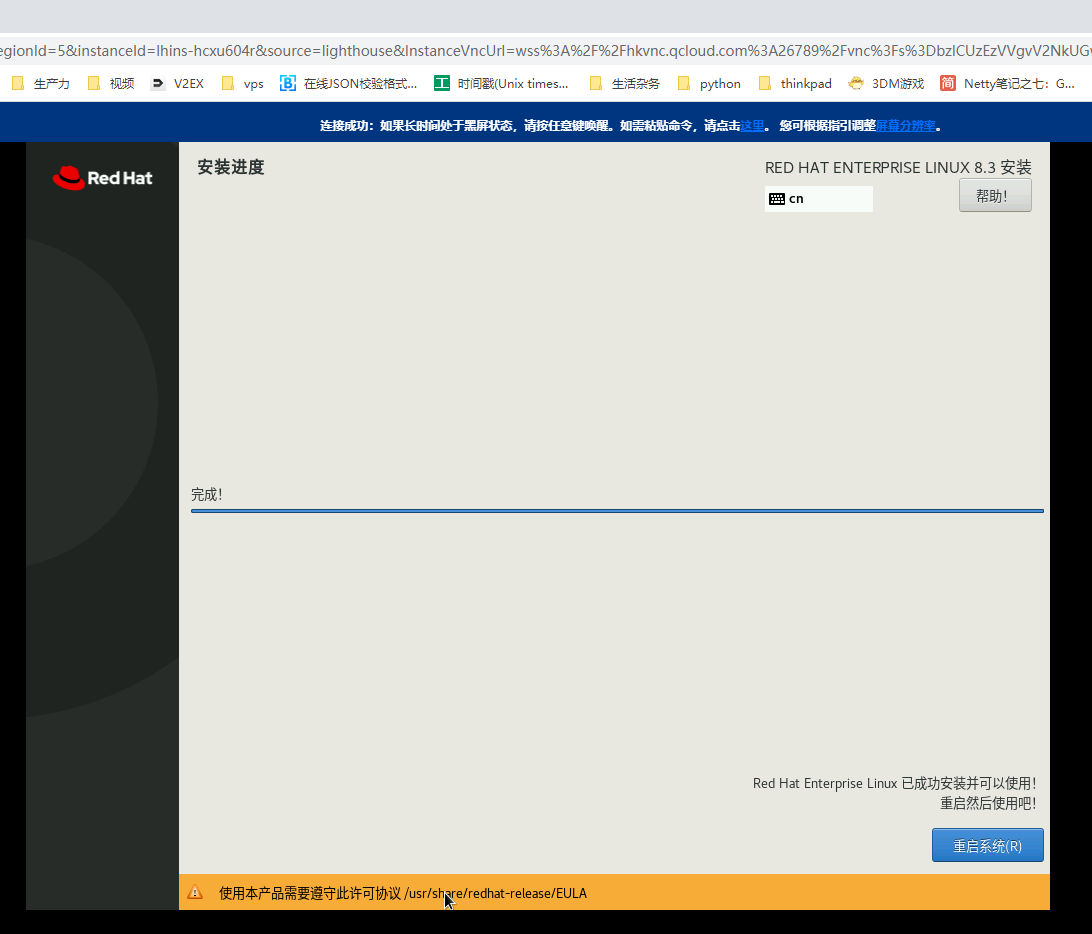
4 安装redhat系统


5 kickstart文件
把ks.cfg上传到镜像网站上,然后在linux16后增加inst.ks=http://someme.me/rhel8-install/ks.cfg即可激活下面的kickstart配置
kickstart配置文件文档:CHAPTER 4. CREATING KICKSTART FILES
例子:
#version=RHEL8
autopart --type=plain --nohome --noboot
# Partition clearing information
clearpart --all --initlabel
reboot
# Use graphical install
graphical


%packages
@^minimal-environment

%end

# Keyboard layouts
keyboard --vckeymap=cn --xlayouts='cn'
# System language
lang zh_CN.UTF-8

# Network information
network  --hostname=rhel8.localdomain
# 用于非dhcp的机器,即使用静态IP的机器,相关变量需要替换
# network --bootproto=static --ip=$IPv4 --netmask=$MASK --gateway=$GATE --device=ens3 --nameserver=223.6.6.6 --ipv6=auto --activate

# Use network installation
url --url="http://someme.me/rhel8-install/BaseOS/"

# SELinux configuration
selinux --disabled
firewall --disabled

# Run the Setup Agent on first boot
firstboot --enable

# Intended system purpose
syspurpose --sla="Self-Support"

# System timezone
timezone Asia/Shanghai --isUtc

# Root password
rootpw --plaintext arloor.com
services --enabled="chronyd"
sshkey --username=root "ssh-rsa AAAAB3NzaC1yc2EAAAADAQABAAABAQDZQzKHfZLlFEdaRUjfSK4twhL0y7+v23Ko4EI1nl6E1/zYqloSZCH3WqQFLGA7gnFlqSAfEHgCdD/4Ubei5a49iG0KSPajS6uPkrB/eiirTaGbe8oRKv2ib4R7ndbwdlkcTBLYFxv8ScfFQv6zBVX3ywZtRCboTxDPSmmrNGb2nhPuFFwnbOX8McQO5N4IkeMVedUlC4w5//xxSU67i1i/7kZlpJxMTXywg8nLlTuysQrJHOSQvYHG9a6TbL/tOrh/zwVFbBS+kx7X1DIRoeC0jHlVJSSwSfw6ESrH9JW71cAvn6x6XjjpGdQZJZxpnR1NTiG4Q5Mog7lCNMJjPtwJ not@home"

%addon com_redhat_kdump --disable --reserve-mb='auto'

%end

%anaconda
pwpolicy root --minlen=6 --minquality=1 --notstrict --nochanges --notempty
pwpolicy user --minlen=6 --minquality=1 --notstrict --nochanges --emptyok
pwpolicy luks --minlen=6 --minquality=1 --notstrict --nochanges --notempty
%end
6 终极放送
wget -O install.sh https://blog.arloor.com/install-rhel8-form-centos7.sh && bash install.sh
里面有很多在上面的过程中没有提及的细节,可以直接完成安装
红帽订阅管理
https://access.redhat.com/management
rhel8重新安装系统
baseUrl="http://someme.me/rhel8-install"
wget --no-check-certificate -O '/boot/initrd.img' "${baseUrl}/isolinux/initrd.img"
wget --no-check-certificate -O '/boot/vmlinuz' "${baseUrl}/isolinux/vmlinuz"
## 生成/boot/loader/entries/下的配置
machineId=`cat /etc/machine-id`
rm -rf /boot/loader/entries/${machineId}-vmlinuz*
grubby --add-kernel=/boot/vmlinuz --initrd=/boot/initrd.img  --title="reinstall"  --args="ip=dhcp inst.repo=http://someme.me/rhel8-install/BaseOS/ inst.lang=zh_CN inst.keymap=cn selinux=0 inst.stage2=http://someme.me/rhel8-install/ inst.ks=http://someme.me/rhel8-install/ks.cfg"
cat /boot/loader/entries/${machineId}-vmlinuz.conf
## 重启在VNC使用reinstall
reboot
